
Navigation:
Home
F3 Wing
Overview
Plans & Parts
Construction
Setup & Mods
|
F3 Wing -- Construction
|
|
Step 1. Draw the outlines for the bottom and top pieces of the wing onto the Depron foam. Use the dimensions on the picture or CAD drawing below. Cut out the bottom and top pieces with scissors or an exacto knife.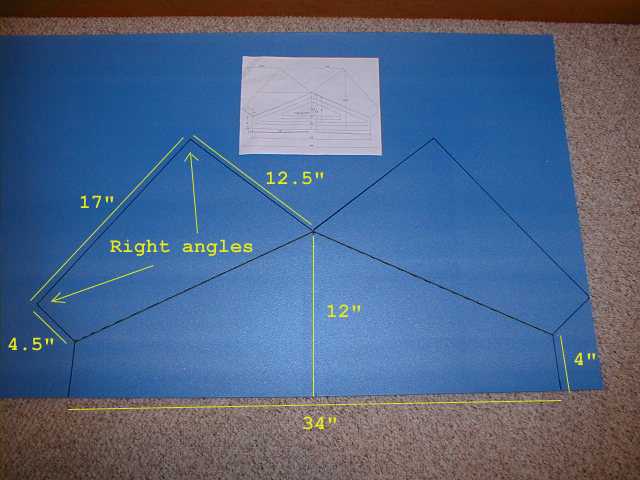 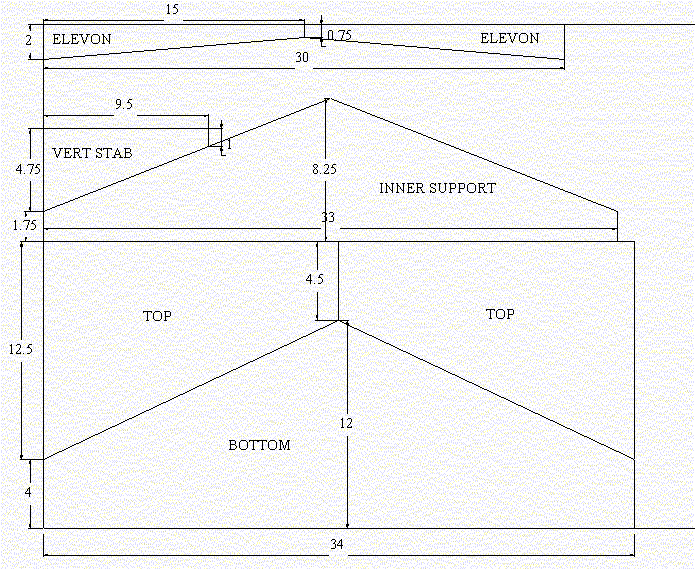
|
|
|
Step 2. Butt the leading edges of the top pieces to the bottom piece and tape them together along the entire length of the leading edge. Turn the whole thing over. Place 3/4" pieces of ply under the trailing edge of each wing tip as shown. Use weights to keep the rest of the bottom flat. Cut a 5/16" dowel into 2 pieces 18.25" each. Cut 4mm thick coroplast into a 8"x1.5" piece. Trim the side of the coroplast near the leading edge of the wing and epoxy onto the bottom piece as shown. Cut 2 rectangles of Depron to about 1"x4". Lay the dowels in place as shown below and fit the small rectangles under the dowels so they are just snug. Epoxy down the small rectangles and dowels -- epoxy the dowels at both ends and also where they contact the small rectangles. Use plenty of epoxy where the 2 dowels meet. 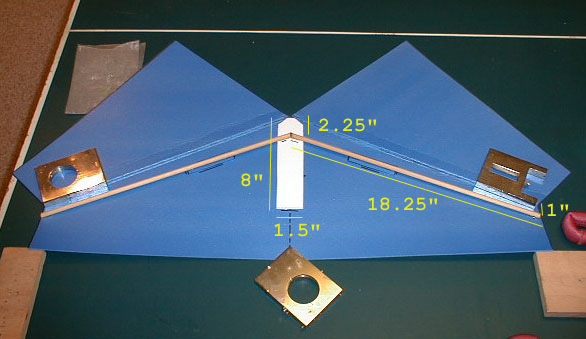
|
|
|
Step 3. Cut out the inner support panel and epoxy it onto the dowel spars and the bottom near the trailing edge. 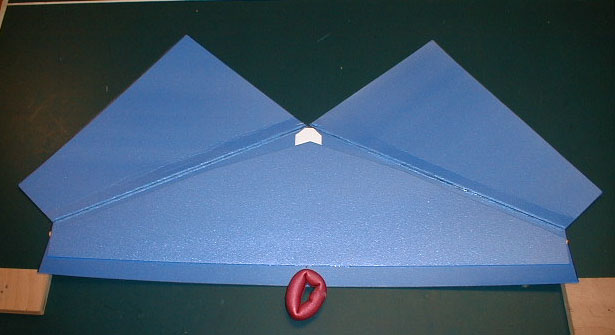
|
|
|
Step 4. Spray a light coat of 3M Super 77 spray glue onto the inner support panel. Wait about 30 minutes. Fold the top panels over and secure by taping the top pieces and bottom piece together at the trailing edge and down the middle. The washout (twist) should look like the picture below. 
|
|
|
Step 5. Cut out the elevons and vertical stabilizer. Tape on the elevons and add colored tape as shown. Use a light colored tape on the top and a dark color on the bottom. 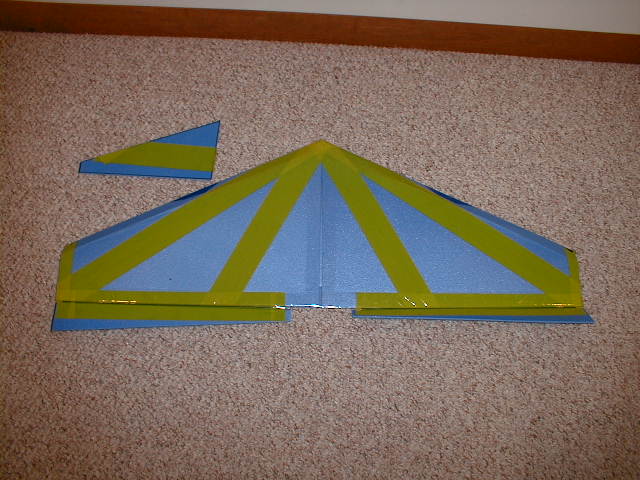
|
|
|
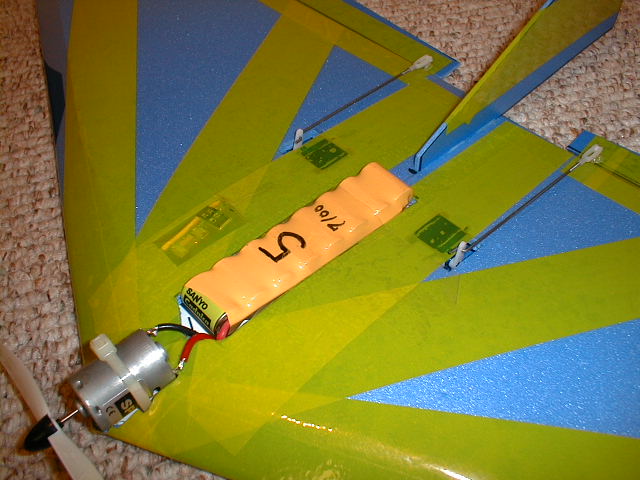
Step 6. Make cut outs in the top piece of foam for the motor, battery, servos, and receiver as shown. Also cut a 3.5" long by 1/8" wide slot for the vertical stabilizer. 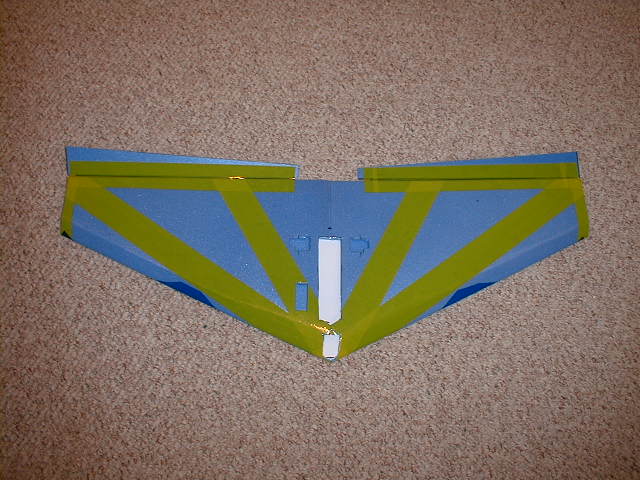
|
|
|
Step 7. Drill two 1/4" holes through the coroplast and bottom foam under where the motor will sit to allow for a tie wrap. Drill two 1/4" holes through the coroplast and bottom foam under where the battery will sit to allow for a twist tie. Solder the ESC to the motor. Push the prop onto the motor and tie wrap the motor to the coroplast. Epoxy control horns into the elevons. Push the servos into their cut outs and cut pushrods to length. Attach the pushrods to the servos and control horns. Route the receiver antenna through the inside of the wing and tape the excess to the wing bottom. Place the ESC inside the wing opposite the receiver via the battery cut out. Connect the servos and ESC to the receiver and place the receiver into its cut out. Epoxy in the vertical stab. Check that the battery fits into its cut out. 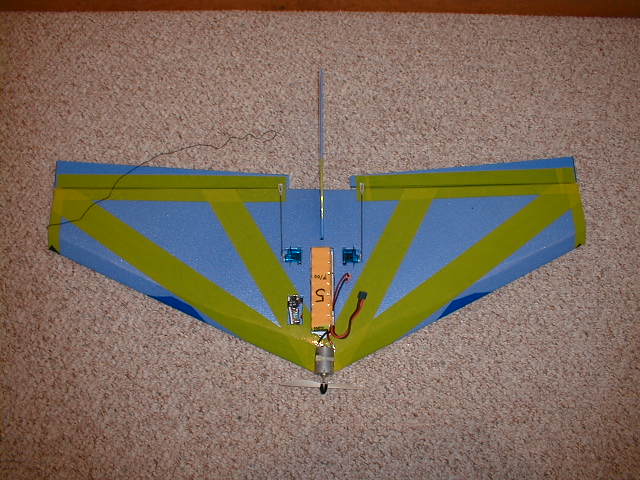
|
|
|
Step 8. Turn your transmitter on and plug in the battery. Check that the elevons and motor are functioning properly -- both elevons should go up when the stick is pulled back. Looking from the back of the model, the right elevon should go up (left should go down) when the stick is pushed right. Add tape over the servos and receiver. Use a twist tie to hold the battery in place (not shown). 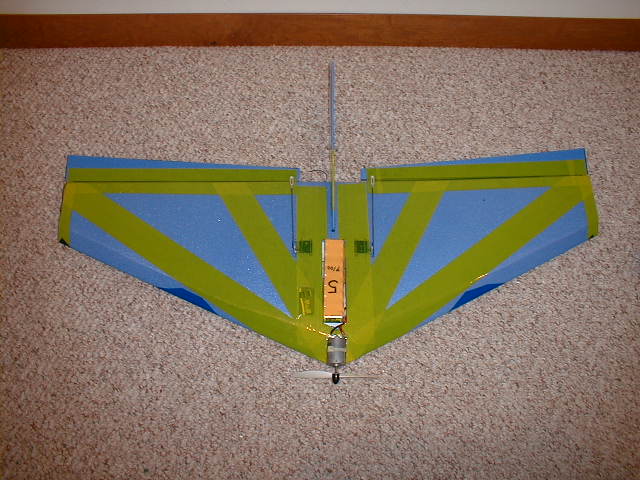
|
|